
Your Cart is Empty
How to Build a Custom Epoxy Resin Tabletop

If you're searching for a DIY project that combines creativity, functionality, and a touch of elegance, crafting a custom epoxy resin tabletop could be perfect for you. Epoxy resin is renowned for itscrystal-clear finish, durability, and versatility, making it a favorite material for artisans and DIY hobbyists alike. Whether you want to preserve natural wood grains or experiment with bold colors and patterns, the options are endless. Below is a step-by-step guide to help you create your own stunning epoxy resin tabletop.
Why Choose Epoxy Resin?
Epoxy resin offers several benefits, making it an ideal choice for tabletops:
-
High Durability: Epoxy resin creates a scratch-resistant and moisture-resistant finish, ideal for surfaces that see daily use.
-
Customizable Design:You can add pigments, dyes, metallic powders, wood elements, or even embedded objects to make your creation unique.
-
Professional Finish: A properly cured and polished epoxy resin top offers a glass-like clarity and a polished appearance.
-
Depth Effect:For river tables or deep pour designs, the layers of resin create a striking, three-dimensional look.
From dining room tables to statement coffee tables, epoxy resin opens a world of creative possibilities.
Tools and Materials You'll Need
Before starting your project, gather these tools and materials to ensure a smooth experience:
Tools
-
Measuring tape
-
Mixing cups and stir sticks (disposable)
-
Heat gun or propane torch (toeliminate air bubbles)
-
Leveler tool
-
Painter’s tape or edge tape
-
Sander (with both coarse and fine-grit sandpaper)
-
Safety gear (gloves, eye goggles, and a respirator mask)
-
Clamps (to hold molds or wood in place)
Materials
-
Tabletop or deep-pour epoxy resin (choose based on the thickness of your pour)
-
Wooden base or panel (e.g., live-edge wood slab or MDF for molds)
-
Epoxy pigments or dyes (optional, for adding color)
-
Mold material (plastic sheets, melamine panels, or tape for edges)
-
Release agent or mold tape (to prevent resin from sticking)
-
Polishing compound or finishing wax (for thefinal touch)
When shopping, check that your epoxy resin is labeled as “tabletop” or “deep-pour,” depending on whetheryou’re working with thin coats or thick layers.
Step 1: Prepare Your Base or Mold
The base or mold sets the foundation for your tabletop’s shape and size.Here’s how to prepare it:
1. Choose Your Base
2. For wood grain designs, live-edge slabs or solid wood pieces work best.
3. If creating a fully resin tabletop, construct a mold using melamine or MDF panels.
4. Seal the Surface
5. Wood is porous, so seal your base or mold edges with a thin layer of resin or a wood sealer to prevent air bubbles during the pour.
6. Prepare the Mold
7. Construct a mold around the edges of your project with melamine or plastic sheets.
8. Use painter’s tape or a mold release agent to provide a barrier against sticking.
9. Ensure everything is level. Resin is self-leveling, so this step is critical for even results.
Pro Tip: For river tables, clamp your wood slabs parallel, leaving space in the center for the “river” of epoxy resin.
Step 2: Mix and Pour Your Epoxy Resin
Mixing and pouring epoxy resin requires precision. Follow these steps to ensure an even, bubble-free layer:
1. Calculate the Resin Volume
-
Use an online epoxy resin calculator to measure the exact amount needed for your project.
2. Mix the Epoxy Resin
-
Follow manufacturer instructions to mix resin and hardener at the correct ratio (commonly 1:1 or 2:1).
-
Stir thoroughly for 2-3 minutes until combined. If adding pigments, now is the time to mix in color.
3. Begin Pouring
-
Slowly pour resin into your mold or over your base in a thin, even layer. For deep pours, work layer by layer, allowing each coat to partially cure before adding more.
4. Remove Air Bubbles
-
Use a heat gun or propane torch toeliminate air bubbles that rise to the surface. Hold the tool about 6-8 inches away and move it in sweeping motions.
Pro Tip: Avoid overworking the bubbles, as excessive heat can scorch the resin.
Step 3: Curing and Demolding
Curing is an essential step in achieving a solid, smooth tabletop.
1. Allow the Epoxy to Cure
2. Check your resin’s curing time (usually 24-72 hours). Keep your space free of dust and disturbances during this period.
3. Demold with Care
4. Once the resin is fully cured, remove the tabletop from the mold. Use a release tool or light taps to separate stubborn edges.
5. Trim and Sand Edges
6. Remove any excess resin with a fine-tooth saw or utility knife. Sand rough edges with coarse-grit sandpaper, progressing to finer grits for a smooth finish.
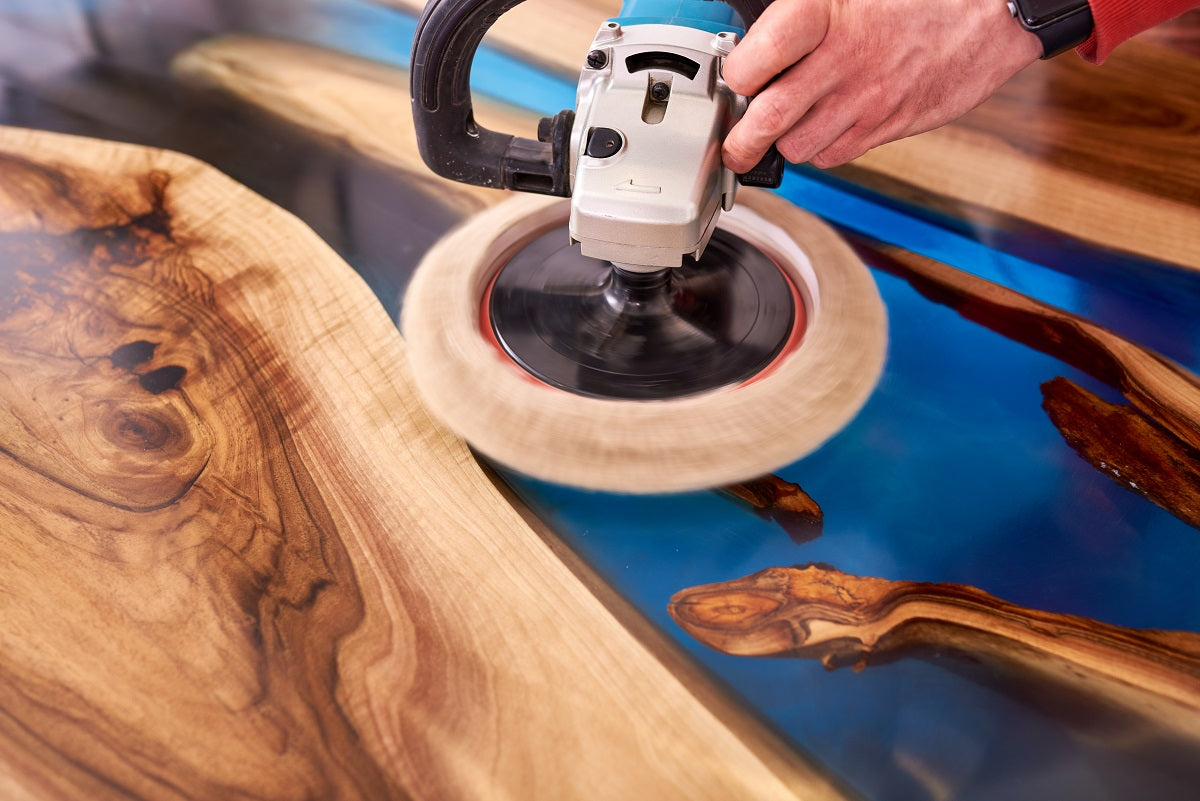
Step 4: Achieve a Polished, Glossy Finish
Now that your tabletop is formed,it’s time to refine it into a professional-grade product.
1. Sand the Surface
2. Start with a coarse grit (e.g., 80) to remove imperfections, and gradually work your way up to fine-grit sandpaper (e.g., 600-800 grit).
3. Optional - Polish
4. Use a polishing compound or finishing wax to bring out a high-gloss shine. Buff the surface until it’s smooth and reflective.
Pro Tip: Want a matte look instead? Skip polishing and leave your sanded surface as-is.
Step 5: Customize Your Tabletop
Epoxy resin is perfect for creative touches and designs. Here are some ways to make your tabletop truly your own:
-
Embed Objects
-
Add small stones, shells, flowers, or photos to the resin layers to capture a unique, personal design.
-
Create Patterns
-
Use metallic pigments or alcohol inks to craft swirls, metallic veins, or marble effects.
-
Blend Colors
-
Experiment with layeredpours or gradients for a dynamic, multi-tonal aesthetic.
Your imagination is the only limit with epoxy resin.
Safety Tips for Working with Epoxy Resin
Working with epoxy can be fun, but safety is essential. Keep these tips in mind:
-
Always wear gloves and a respirator mask toprotect from fumes and skin irritation.
-
Work in a well-ventilated area with protective coverings on surfaces.
-
Follow disposal guidelines for uncured resin and used materials.
Create Your Dream Epoxy Resin Tabletop
Building your own epoxy resin tabletop is a rewarding project that yields a stunning, custom piece of furniture. With the right tools, materials, and steps, you can craft a tablethat’s as durable as it is beautiful. Experiment with colors, shapes, and patterns to create a tabletop that reflects your style and creativity.
Get started today and bring your vision to life! Whetherit’s a sleek dining table or a vibrant coffee table centerpiece, your epoxy creation is sure to impress.